Pure and Simple Mama’s Gluten Free Bread
Posted On January 15, 2020
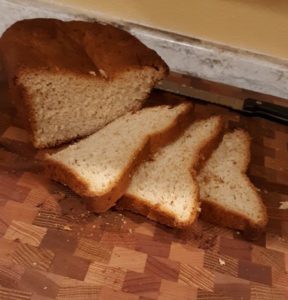
All I can say is this Gluten Free Bread is so yummy! It has that soft texture, doesn’t crumble easily, and toasted up perfectly. I love how it tastes! Some flours that I used have had a weird flavor and made the bread so dense and heavy that it was hard to eat. Not this one!! I am so pleased with how this has turned out. I hope you enjoy!
Pure and Simple Mama’s Gluten Free Bread
This is a wonderfully tender loaf of bread. I love the taste and it is great for toast at breakfast
Equipment
- Oven
Ingredients
- 1 1/2 cups Any milk or water (warmed)
- 1/2 cup packed brown sugar
- 1 Tbsp active dry yeast
- 2 3/4 cups My Best Gluten Free Flour Blend
https://pureandsimplemama.com/the-best-gluten-free-flour-blend-for-breads-and-muffins/ - 1/4 Cup Ground flaxseed
- 3 tsp baking powder
- 1 tsp cream of tarter
- 1 1/2 tsp salt
- 1 Tbsp corn starch
- 2 eggs
- 2 tsp Apple cider vinegar
- 1 Tbsp olive oil
- parchment paper
- Foil
Instructions
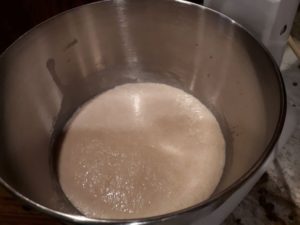
- Preheat oven to 350 degrees. In a microwave safe bowl (I use a glass measuring cup) heat milk or water in microwave until liquid is at least 105-110 degrees. Pour warm liquid into a mixing bowl, along with the brown sugar and yeast. Take a whisk and gently whisk together, making sure the yeast is all in liquid and there are no big clumps. Let this mixture set and proof, which means it will look like a "mushroom cloud" when it is ready. (Usually, about 8-10 min.) While waiting on this to proof, measure out all dry ingredients and put in a bowl; set aside.

- When proofing has finished, add dry ingredients to yeast mixture along with the eggs and vinegar. For this bread you want to use the whisk attachment (if using a Kitchen Aid mixer) NOT a dough hook. Mix this well, turn down the speed and add olive oil. Continue mixing well, until smooth. It will look like thick cake batter.
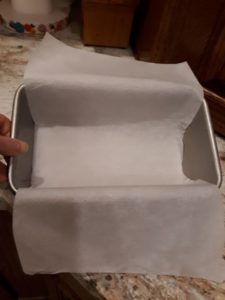
- In a loaf pan, cut a piece of parchment paper and line the bottom, spray the parchment paper and sides well, with oil. Next, take a spatula or spoon and add bread mixture to pan. Smooth it out and make sure it is evenly in the pan. This is much like smoothing a cake. When done, spray a piece of plastic wrap and cover loosely; set in a warm place for at least 45-50 min or until the bread has risen to the top edge of the loaf pan.


- When Bread has risen, very carefully, place in the oven and bake for 65-70 min. About 25-30 min into cooking, check the bread and see if the top is getting brown. If it is getting too dark, cover lightly with a piece of foil to prevent the bread from burning on the top. When the timer goes off, check with a thermometer and if the bread is done, it should register about 210-215 degrees. I also run the thermometer all the way down into the bread and see if it comes out clean. If it is not clean, place back into oven for 3-5 more min. Check again, the same way. Take out when done and let rest for 5 min. in the pan. Gently, take out of the pan, by using the longer pieces of parchment paper on the sides. If it has stuck to the sides, you will need to get a knife and carefully go down the sides to release it. Let the bread set and cool a little before cutting. (it is really hard to wait, but important..)

Notes
**Always remember that Gluten Free bread is very different than making regular bread. The process, texture, and bake time is totally different. I have found that little things can factor into a loaf not turning out just like you want it to. DO NOT GIVE UP! This way of cooking takes time and practice. Please leave me a comment and let me know if you have any issues. I would be more than happy to answer questions!**
